Within Portal 2.0, a user can convert a controller or a number of controllers into a single virtual room. This allows all of the I/O to be populated under the same room card, and move rule folders and associated rules underneath the virtual room. This feature is being rolled out slowly to our userbase, so if one does not see the UI elements described below, one may not be flagged to have this feature currently.
There are a couple of requirements in order to move controllers into a virtual room:
1) All sensors to be assigned to the virtual room cannot be being referenced by a different virtual room.
2) All devices to be assigned to the virtual room cannot be being referenced by a different virtual room.
3) All rules to be assigned to the virtual room cannot be associated with a different virtual room.
Converting a single controller into a room
To convert a controller into a virtual room, login to Portal 2.0, navigate to the Rooms page, then click the icon of an Up arrow on the Room card for the controller you wish to convert: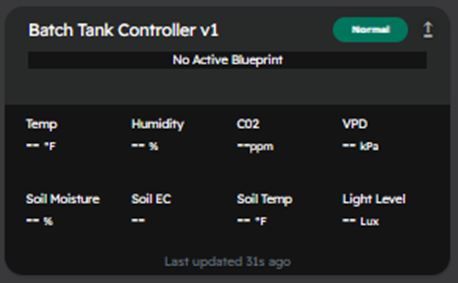
Once clicked, The Room Conversion wizard will populate on your screen: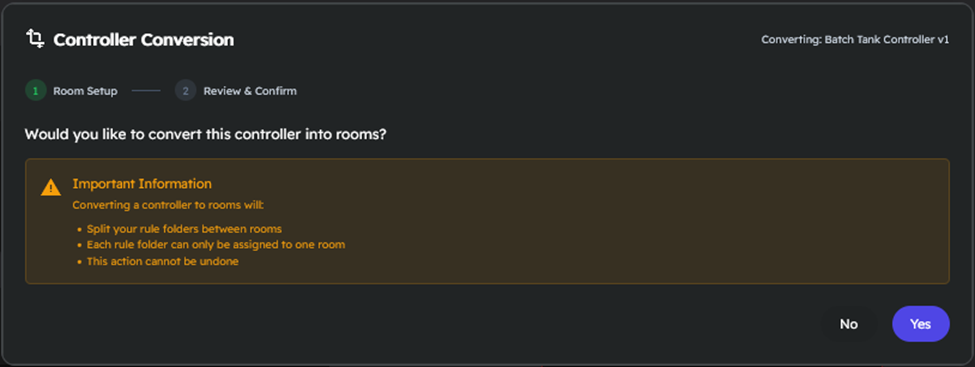
Click Yes to continue the conversion process.
In the next screen, specify how many Rooms to create, the name of the room(s), the square footage of the room, the type of room (Production, Non Production, or Fertigation), and assign all the relevant rule groups to the associated room(s):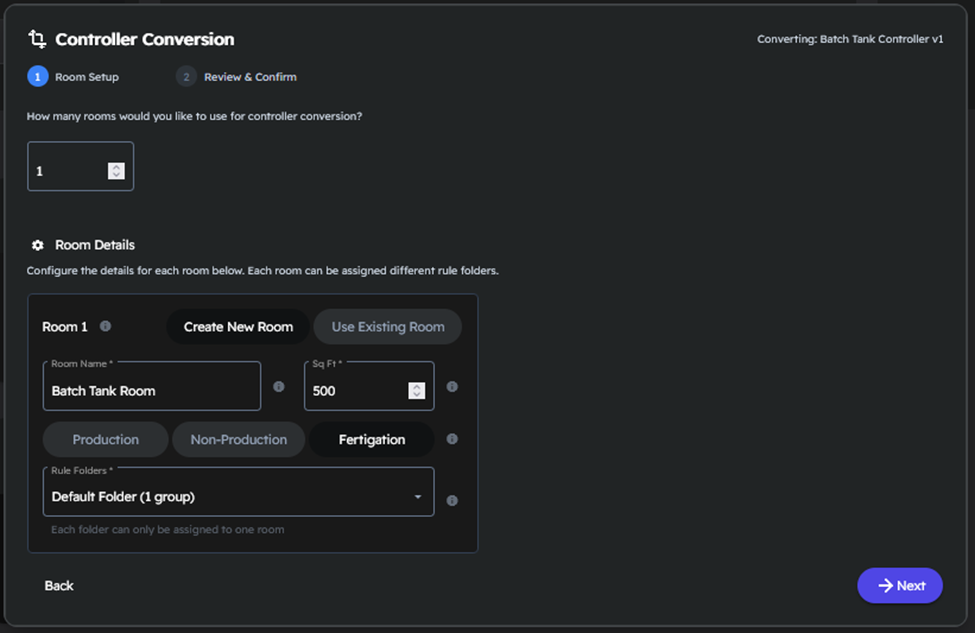
Note: PIC’s, LINKS, Integration Hubs, and BTM’s can only be assigned to a single virtual room and cannot be split into multiple virtual rooms.
Hit Next to continue the conversion process.
The next step in the Room Conversion Wizard will attempt to validate the conversion by checking all sensors, devices, and rules for the controller to ensure they are all associated with a room. Any unassigned devices will show up in the bottom of this stage, where one can manually re-assign them if needed: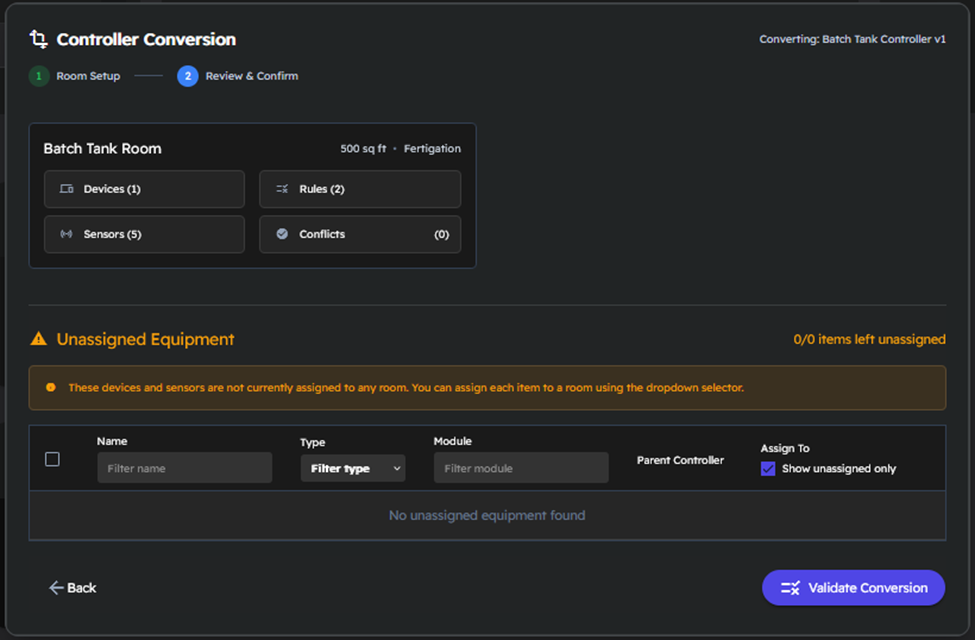
Once all sensors, devices, and rules have been assigned correctly, one can click the ‘Validate Conversion’ button to check for any logical conflicts that would prevent the room conversion form taking place.
Once the Validation completes, a checkmark will populate above the room(s) indicating there should be no logical conflicts arising from creating the virtual room(s). Click the ‘Confirm Conversion’ button to begin the Room Conversion Process: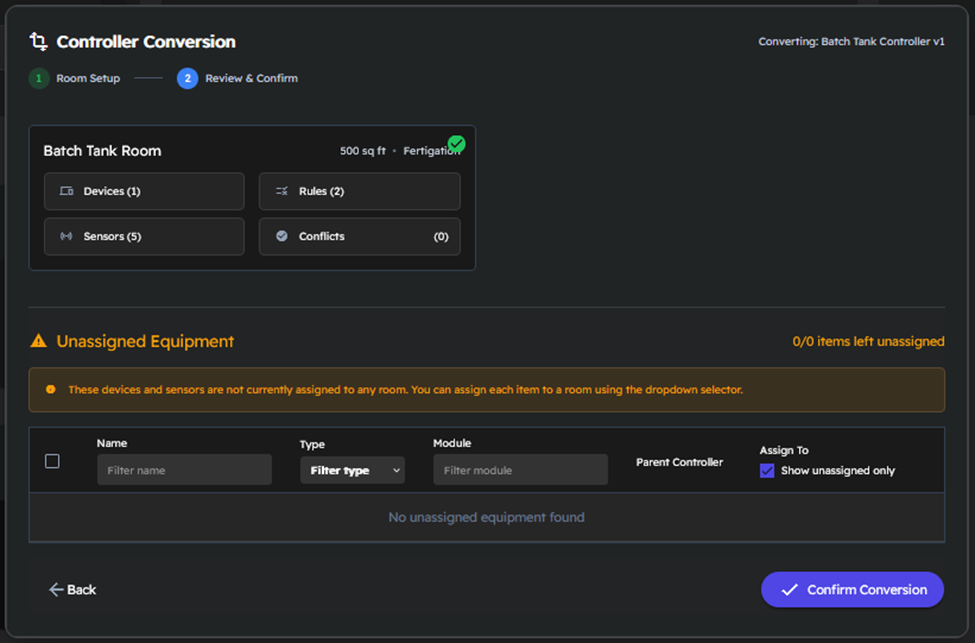
This Conversion process, will create a new virtual room using the setting provided, move the rule folders underneath that room, as well as the relevant I/O: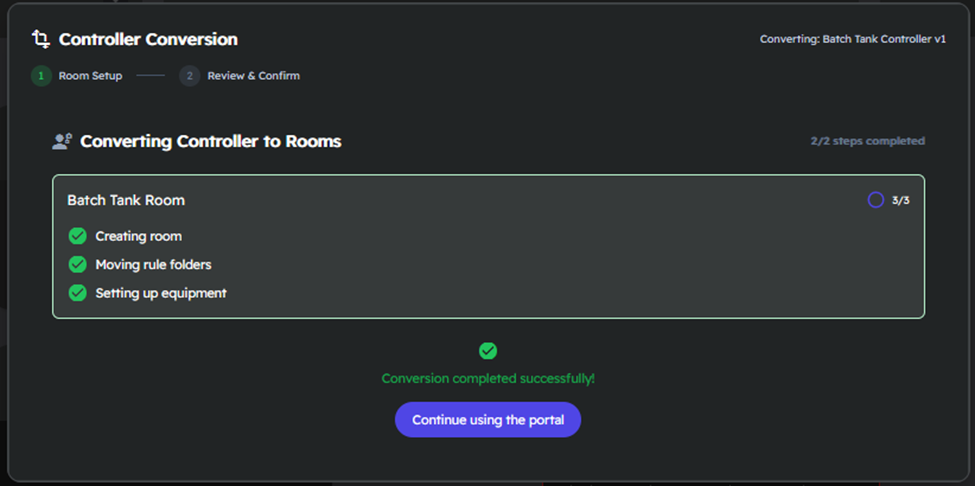
Click the ‘Continue using the portal’ button to be sent back to the room dashboard.
Adding hardware to an existing room
Within the Hardware Tab, users can add hardware to an existing virtual room. For PIC’s, LINKS devices, Integration Hubs, and BTM’s, the entire controller is assigned to a single room. This is done by using the ‘Assigned Room’ dropdown for the controller:
For customers with Environmental Control panels or Connect Controllers, the user is able to assign sensors and devices to a designated virtual room. This can be done at the Module level or on a per-device basis using the ‘Assigned Room’ dropdown: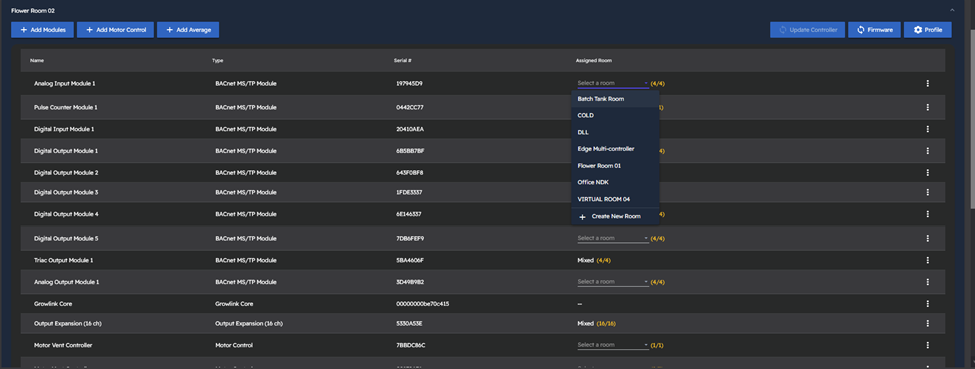
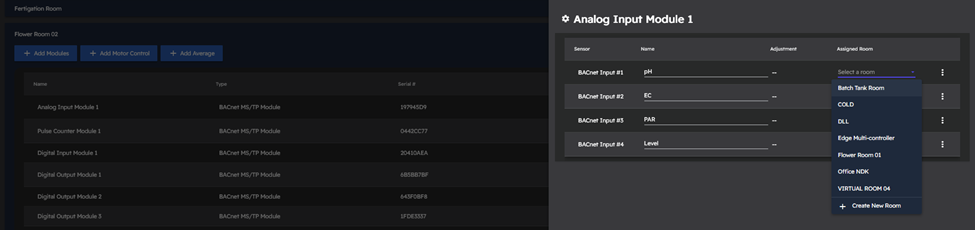
Devices that are already assigned to a room cannot be re-assigned unless all associated rules referencing that sensor or device are deleted or re-configured to not include that sensor or device. There will be an info icon next to the sensor or device’s room assignment that will indicate what rule is currently referencing that sensor or device that would prevent it’s re-assignment, and allow you to jump to the rules page with the rule indicated that needs to be updated: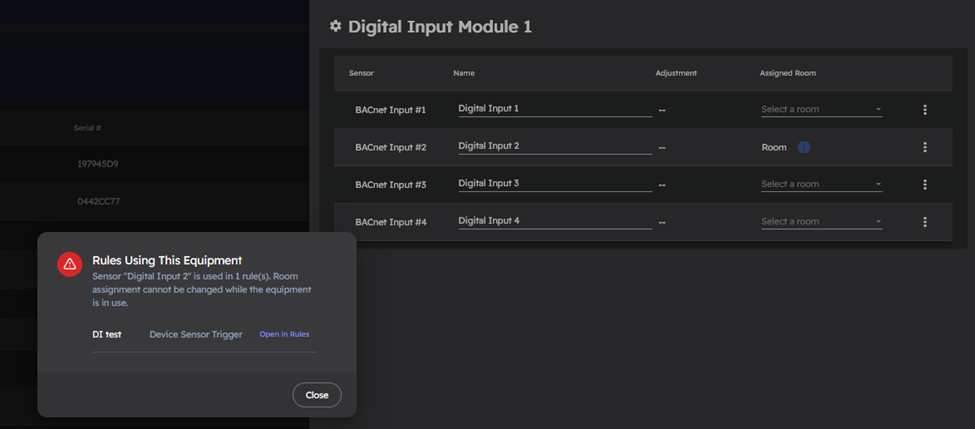
Editing Room Settings
One can update the Room Name, Square Footage, and Room Type of a virtual room by clicking the Gear Icon for a virtual room within the Rooms dashboard:
This populates a Room Settings modal, which will allow you to update the Room Name, Square Footage, and the Type of Room accordingly: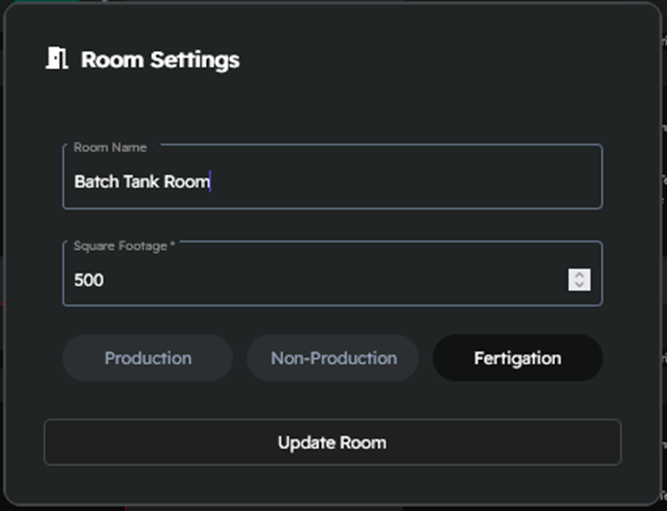
The Room Conversion UI is being rolled out to a larger portion of the userbase over time. If one does not see the UI elements described above, your customer account has not been flagged to use this feature yet.