From FloEnvy Mobile App:
- Connect your scale (see "Connecting Ohaus Ranger 3000 Scale to the FloEnvy Mobile App" article)
- Connect your RFID reader (see "Connecting Zebra RFD40 and RFD8500 to the FloEnvy Mobile App" article)
- Open the FloEnvy Mobile App
- Either select an existing scheduled Harvest task, or select "Harvest" from the list of flexible tasks to begin a new one.
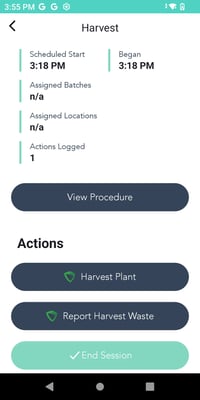
- From the list of Actions, select "Harvest Plant". This will open a form for submitting harvest data.

- Scan a plant RFID tag. FloEnvy will search for a matching plant record, and assuming there is a match, will fill in this field
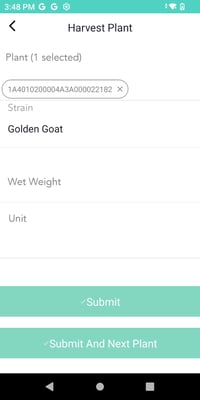
- Place your plant on the scale, and then (if auto-print is disabled), press the "Print" button. FloEnvy will read the weight data from your scale, and fill in the amount and specified unit.
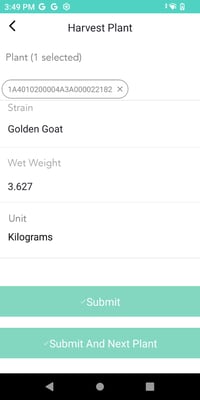
- Fill out any remaining fields (if any)
- Tapping "Submit" will submit your harvest data and return to the Harvest task, or, tapping "Submit and Next Plant" will submit your harvest data, and then clear the form, ready to submit a new record.
- The last step is to finalize the harvest transaction. This must be done in the FloEnvy Dashboard.
- Navigate to the task and open the Harvest Plant action item.
- Select the rows you wish to finalize, then click “Finalize”. This will process the Harvest transaction and set the plant’s status to “Harvested”.